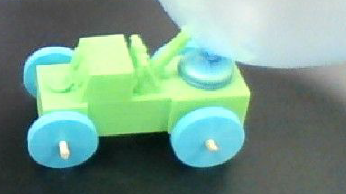
Balloon Powered Car Lesson |
For this project Mr. P wants you to explore and better understand Newton's Laws of Motion. You will be tasked with having to design a 3D printable toy car that would be powered by a balloon. The car will be used as an example of Newton's 3rd Law of Motion. The design and building of these cars will have you use prior knowledge in all areas of building using Tinkered, math and other subjects to help support your build.
OBJECTIVE: Students will demonstrate Newton's 3rd Law of Motion, examples of an energy transformation, and understanding of unit on pressure by completing an engineering balloon car design activity.
What You Need: Cool Teacher Like Mr. P! - Wait the real list - 3D Printer, Balloon car designs, Bamboo skewers, balloons.
DON'T FORGET A COPY OF THE DIRECTIONS AND LAB REPORT
Download and fill-in digitally
Download and fill-in digitally
| 3dPrintedBalloonCarLabReport.docx | |
| File Size: | 86 kb |
| File Type: | docx |
Here Is What You Need To Know!
1. I printed the wheels ahead of time for you so you only need to make the body. But if you would like to modify your can download
the STL below
the STL below
Wheels |
| ||||||
2. We will use bamboo skewers from the supermarket as the axles. They come in different sizes, the ones we used were 10 inches. They fit snugly into a wheel with a central hole 3.5mm in diameter. May need to glue them see me if this is an issue.
3. The body of your car will need to have a raised, lipped connector for the ballon to attach too. It also needs a pipe to redirect the
air out the back of the car. The car body also needs to have holes 5 mm in diameter for the axles (bamboo skewers). Refer to
step 2
air out the back of the car. The car body also needs to have holes 5 mm in diameter for the axles (bamboo skewers). Refer to
step 2
Below Are Designs Below To Help Beginning Groups
(Advanced Builders Use Instructions Above)
Design 1: |
| ||||||
4. Work your design out using Tinkered.com making sure follow all the steps above.
Building Tips:
1. Watch out for car bodies you are designing that may end up being too short. If the front and rear axles are too close together the wheels will
interfere with one another and the short wheel base will make it difficult for the car to move in a straight line.
2. Watch out in the back of the car that the air exiting out the back is not in an upward angle. This can put downward force on the back of the car and
can make it do a wheelie. (Which is Cool!). Make sure the pipe exits horizontal, or attach a nozzle to the end to direct the flow of air in the right
direction.
3. The pipe for the air will have to make a 90 degree turn and could prove to be very tricky for you. Using the torus, or the "doughnut slice" shape
generator on Tinkercad works well. You can temporarily turn the body of the car to a hole so you can see an "x-ray" view inside and make sure the
air pipe isn't intersecting the axle, etc.
4. When making the connector for the balloon error on the side of making it a bit larger than necessary. The balloon will stretch over it. If it's too small
the balloon won't stay and you'll need to tie it on. A twist tie works well for attaching balloons when necessary.
5. After printing your car you will need to get a balloon and be sure it can attached to the connector. The balloon can be inflated by
blowing into the end of the pipe at the back of the car. This is a lot easier than inflating the balloon and then trying to connect it to
the car. When released the air blowing out the back pushes the car forward.


